Posted in DIY

Wrapping Ideas 💡

Mari mengubah posting penuh konten negatif kemarin dengan proyek do it yourself kecil-kecilan ♥

Kemarin iseng-iseng gegara ndak punya kertas kado, saya bikin bungkusan kado dengan modal amplop coklat dan dollies paper yang jumlah nya tak terhingga di kantor.. myehehehe.. 😋

Kata Elza sih lucu banget.. Jadi GR dong! Tapi emang lucu sih dan bisa jadi alternatif bungkusan yang tak biasa.. ahiw 😚

Oke, 5 menit jadi karena hanya butuh gunting, lem dan pembolong.. Pita warna warni sebagai pemanis, tali burlap juga boleh biar lebih rustic..

Pertama, saya gunting jadi 2 bagian dollies paper.. Bentuknya jadi setengah lingkaran.. Niatnya sih supaya bagian ukiran nya bisa ketemu di tengah, jadi lebih cute gitu lho 🤪

Masing-masing bagian di tempel di atas dan bawah amplop, kelebihan nya ditempel ke belakang.. Masukin kado nya, trus bikin bolongan di bagian atas.. Untuk mengunci nya, kita pakein pita deh..

Voila!

Gampang banget kan, guys?!

Pokoknya akhir-akhir ini lagi gemar banget mengkreasikan dollies paper.. Dollies paper, penyelamat kertas-kertas yang membosankan 😚

Happy Birthday, Kak Vina!

Love,

Posted in DIY, Lamaran, Thoughts and Sense

Cerita Lamaran : DIY Engagement Ring Bearer

Hello 2018 !

b

Bermula dari modusan anak gajah dengan botol-botol kosongnya itu, akhirnya saya seperti bermimpi kalau ulang tahun di tahun 2018 ini saya dilamar.. Sama anak gajah 😀 .. (tapi Pak Winardi dan Bu Sumilah bukan gajah ya, *takut kualat hehe)

Jadi inget, dulu saya ditembak dua kali.. Yang pertama di salah satu coffee shop di Menteng Huiz, keren kan dengan jendela besar-besar di suatu sore di kawasan Cikini yang menyenangkan.. Berhubung saya orangnya rempong, tembakan pertama agak meleset seperti adegan Keanu Reeves di Matrix.. Sebenernya gak meleset sih, cuma waktu itu ada beberapa masalah yang harus diberesin dulu.. 😛

d-e1516850588421.pngd-e1516850588421.pngd-e1516850588421.png

Sebulan kemudian, anak gajah yang sabar nembak lagi.. Kali kedua gitu ceritanya.. haha.. Nah yang kedua itu gak keren bener.. Latarnya resto soto kudus langganan anak gajah di daerah jalan wijaya.. (memang enak sih sotonya #gakfokus).. 😀

Singkat cerita, anak gajah yang kenyang abis makan soto pake otak goreng gitu, tetibaan mesem-mesem intro “nona, gw mau ngomong sesuatu”.. Aih syadap, feels like butterfly in my stomach alias senewen deg-deg syer demen-demen GR gitu.. Dalem ati : “ciyeee mo nembak nih mo nembak nih” hahaha *jijik* 😛

Di situ, saya gak mengiyakan secara gamblang (perempuan penuh kode apalah itu, *ngeselin banget* ).. Tapi semenjak saat itu sih saya merasa resmi jadian, tau deh kalo si anak gajah.. Sepertinya dia masih belum tau kalo saya mau jadi pacarnya, haha.. 😀

Intro nya panjang ya.. Hehe.. Nanti lanjut lagi deh di postingan ke dua dengan judul kisah kasih anak gajah.. haha

Sekarang saya mau kasih lihat hasil karya DIY Engagement Ring Bearer yang saya iseng-iseng bikin.. Niatnya untuk lucu-lucuan gitu kalo difoto.. Semua bahannya murah meriah dan bisa beli online..

Bahan-bahan :

  • rumput angin (Rp.3000/ 10 gram)

  • bunga-bunga palsu (Rp.10.000/ iket kira-kira ada 15 bunga)

  • mutiara-mutiara-an

  • huruf-huruf kayu (ini saya ambil dari game scrabble, beli online juga ada)

  • wadah kayu atau anyaman sesuai selera

Cara :

  • Siapkan wadah kemudian susun rumput angin di dalamnya dan ratakan permukaannya

  • Taruh box cincin di atas rumput angin, kalo temen-temen mau langsung taruh cincin nya juga gapapa, tapi kalo saya lebih suka pake box nya aja supaya cincin lebih stand out

  • Sebar bunga dan mutiara bo’ongan sesuai selera 😛

  • Taruh inisial nama kedua calon

Tadaaaa… DIY Engagement Ring Bearer ala ala  yang bisa dibikin sekejap saja..

Ini idenya muncul dari ring bearer yang bersliweran di instagram dengan model rustic lucu.. Karena saya suka segala sesuatu DIY Project jadi iseng deh bikin.. Untuk taburan mutiaranya itu ide anak gajah supaya lebih meriah.. Lumayan kan jadinya gak biasa gitu kalo di posting di instagram.. Hehe

Selamat berkreasi teman-teman.. Oiya tunggu cerita lanjutan Si Nona dan Anak Gajah ya, hehe.. Masih bingung dengan status dilamar seorang laki-laki kemarin.. Finally found someone to share every part of my life, I’m beyond happy.. Alhamdulillah ♥

Love,

D4779E20035572AC7E2816A17121536E2

Posted in DIY

DIY Clutch Bag : Ethnic can be so glamorous too !!!

“I just find things that work and embellish them.” Lindsey Buckingham

a

Hello there,

It was such a long wait to have 15 minutes free time to update my blog.. Actually I had many stories to write about but these business couldn’t be postponed indeed.. So, now I want to make sure my 15 minutes free won’t be wasted.. Hehe..

Last Saturday, I made a simple DIY clutch bag.. Actually it wasn’t a real DIY because all I do was sticking, sticking and voilaa.. Super easy and super fast, here we goo..

b

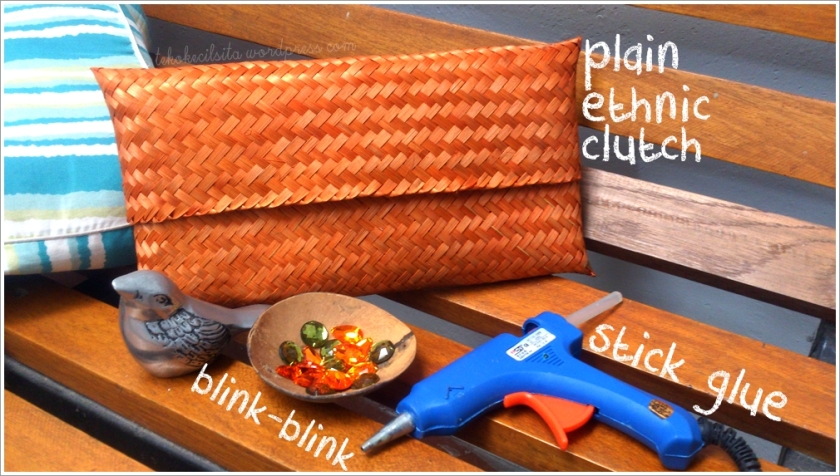
Here the materials :

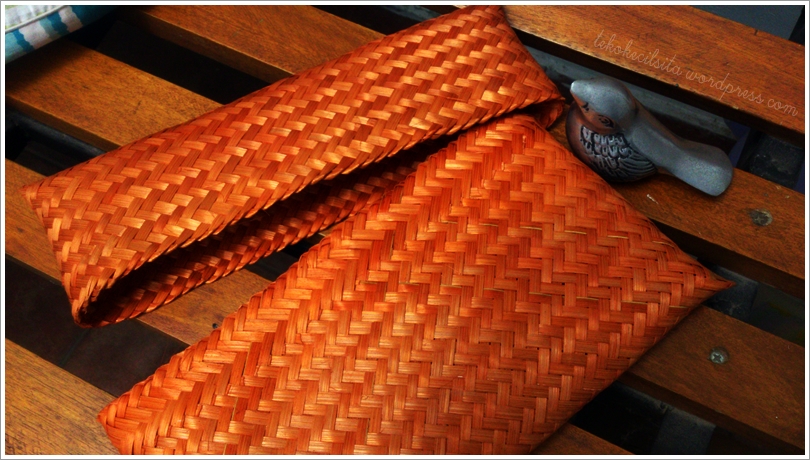
♥ Ethic clutch bag made from bamboo. In my country, Indonesia, this clutch bag can be bought in traditional market or some souvenir shops.. Mine was bought in Yogyakarta..

d

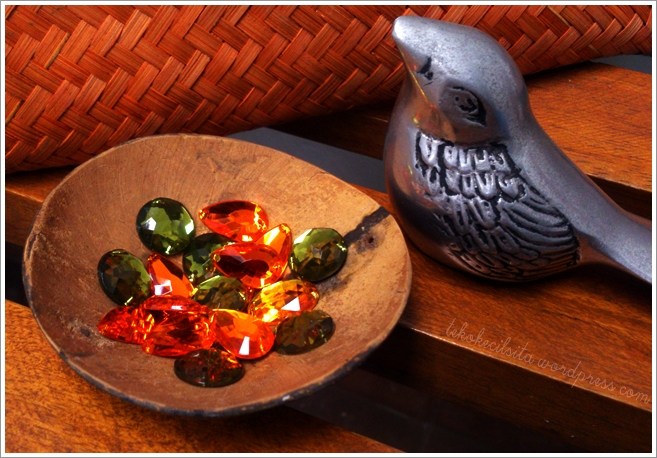
♥ Beads. I used the blinking beads.. Those are flat and easy to be attached..

c

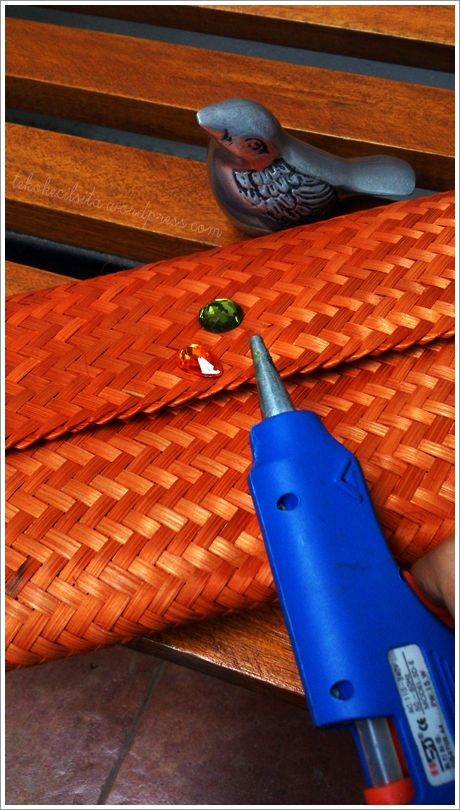
♥ Stick glue


SP_HappyGoLucky_Stitching


First, you can make your own pattern for attaching the beads in your clutch bag.. You can make spread out pattern or full pattern.. It depends on your preference look of your clutch bag.. For mine, I was going to embellish the center part due to limited beads.. hehe

e

Stick and stick.. It was a little bit tricky because sometimes the glue spilled out behind the beads.. So make sure you don’t put too much glue or it will make your clutch bag looks not good 🙂

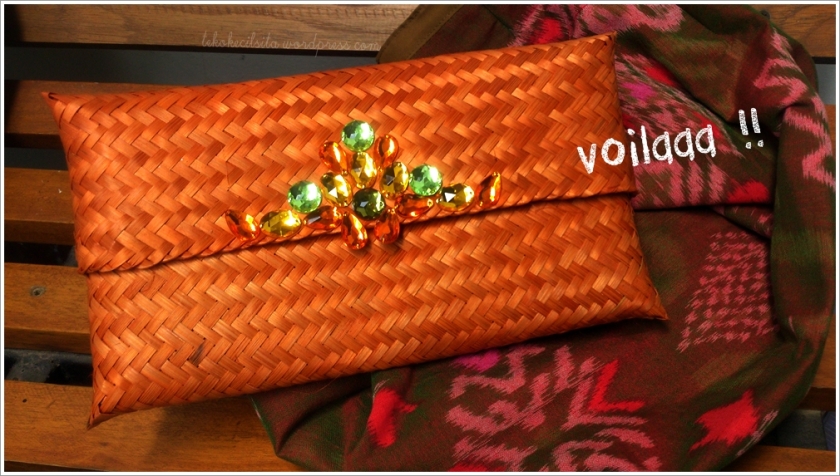
Dum dum durunduuum

f

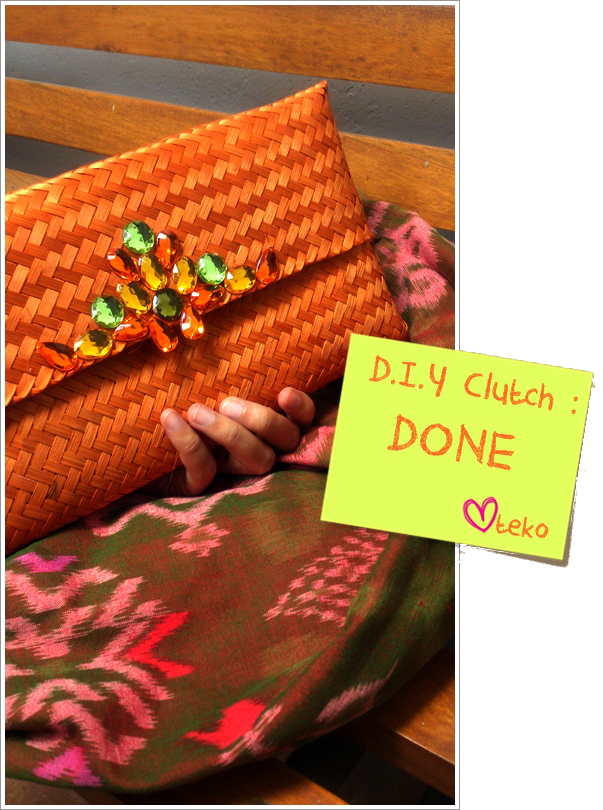
Here my DIY clutch bag.. Ethnic clutch bag yet so glamorous.. Let’s go party!! 😀

g

Thanks for reading my post.. I hope you like it!!

Will be back soon with more interesting stories.. Have to back work again, byeee ♥♥♥

Love,

D4779E20035572AC7E2816A17121536E2

Posted in DIY

Kumari, The Melancholy Plushy

“Melancholy is the pleasure of being sad.” ~Victor Hugo

d

RPENN_expressyourself-ribbon4

Well, time goes really fast, indeed.. I had mentioned in every post that time goes really fast and yeah it’s already July 2014.. Unfortunately my July welcomed by the health that dropped slightly.. Got fever in fasting month was not a good idea.. Huhu.. Anyway, who says it’s a good idea?!!  :p

This fever made my weekend passed by doing nothing in the home sweet home..  Looking at the good side, actually this is what I have waited for couple of weeks.. Me time!!! Although it was not as good as my thought since this sickness came in the wrong time..

Let’s just forget this fever because I wanted to show you about recycle the old tee into beautiful plushy..

 q

Well, first time seeing this tee, I couldn’t afford not to buy it.. Since then, it was one of my fave tees.. Wore this to hang out with friends very often like didn’t have any other tees.. Haha.. It had accompany me passed these 4 years make it looked so dull and exhausted.. It even turned as pajamas lately.. Hmm Yes, I thought “It’s time for your retirement, tee!” huhu.. But, I couldn’t put this tee away.. So, I decided to recycle it into something pretty.. Interesting? Let’s see what I’m gonna do..

RPENN_expressyourself-ribbon4

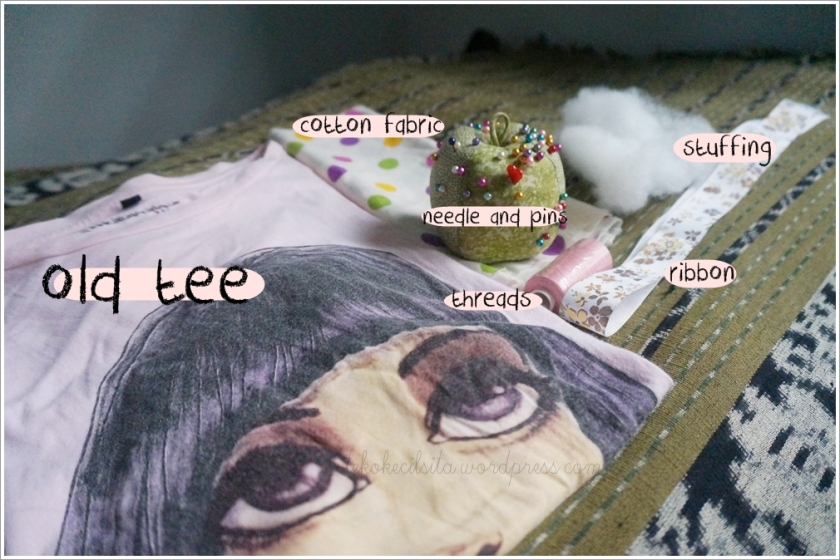
So, here the materials :

♥ old tee

♥ pins, needle and thread

♥ cotton fabric

♥ ribbon

♥ stuffing

b

How to do???? Just follow the pictures here :

c

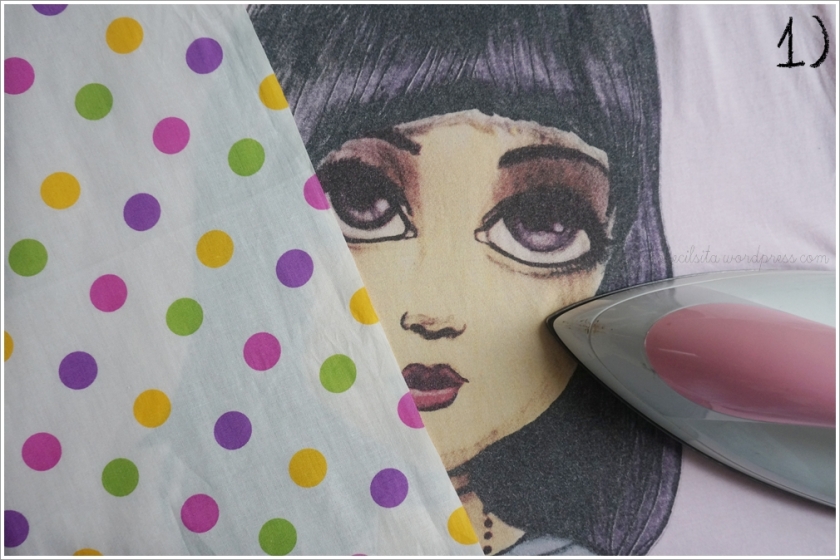
As always, ironing the fabric first.. It would make the fabric sleeker and easier to sew..

d

After ironing, I cut the doll pattern in my old tee.. Don’t forget not to cut the pattern too close because we have to give some space for sewing later.. I leave around 1-1,5 cm, then..

e

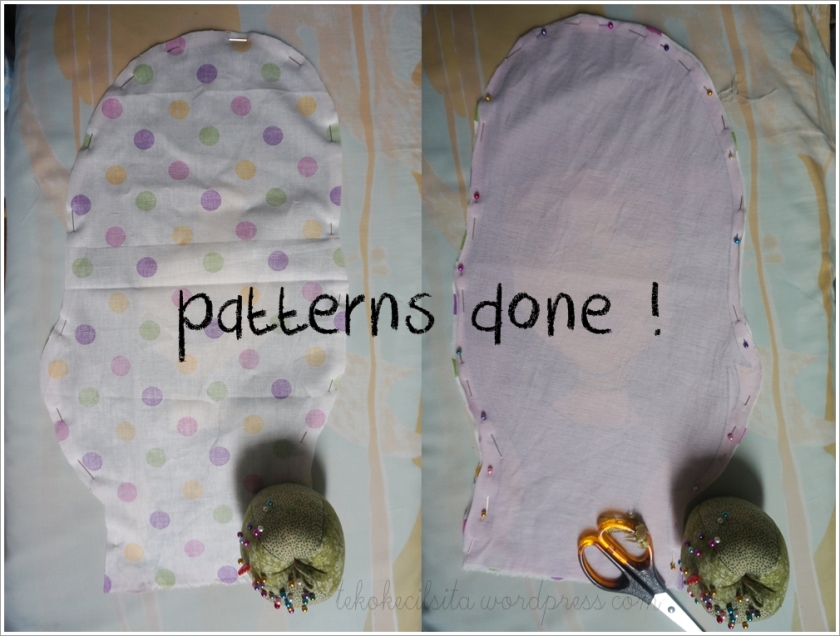
Now, attach the doll pattern to cotton fabric.. Attach it exactly in the same position as I did in the picture.. I mean, the right side were facing each other.. After that, attach the pins along the pattern to secure it..

f

Cut the cotton fabric following the doll pattern.. Alright, now we have the pattern with its right side facing each other and the pins around the pattern.. Let’s move to sewing machine.. 🙂

g

Tips : before sewing, you can draw a line as a sign for you to sew.. Actually I forgot to draw a line here, so I just follow the pins to sew it..  :p

hi

This was where my ribbon being attach.. Anyway this is optional.. As usual, I like to attach the ribbon to my all plushy as a “brand tag”.. Just to mark my plushy, anyway.. hihi

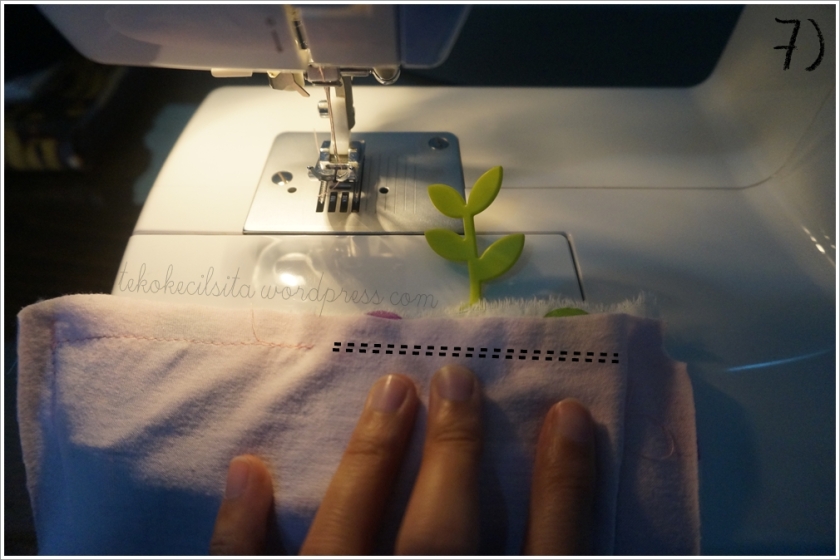
Well, don’t be so “into it” with your sewing machine.. hehe.. Remember to put some space to reverse the pattern to the right side.. So, stop sewing and give 10-cm-space.. Now we’re done with the sewing machine..  ♥

j

k

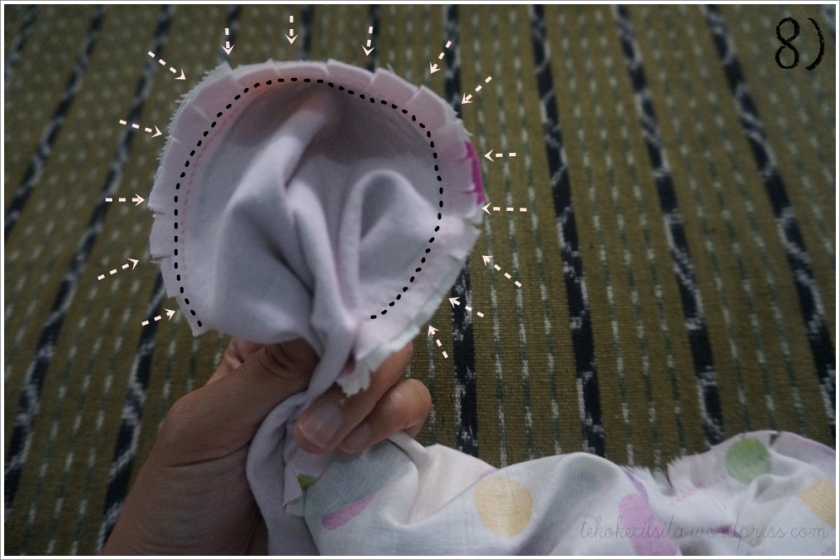
Before reversing the pattern, cut the pattern upright to the sewing line.. It would look like big fringes along the pattern.. Why did this? Good question.. Previously, I reverse the pattern to the right side but then the pattern looked so full and messy in the edge part.. Then, I did this, big fringe.. The result when I reverse the pattern was better and more presentable.. 🙂

l

Last but not least was stuffing my plushy.. Somehow, this part was the most tricky part.. Make sure to fulfill all the patterns with the stuffing was a longtime job for me.. Huhu.. Anyone has the same difficulty?

m

Finally, did the ladder/blind stitch for closing the opened part of the plushy.. And doneee yeah!!

a

Yes, I’ve named this plushy Kumari.. What is Kumari? Kumari in Sanskrit (Sansekerta) means girl or daughter.. I think it’s pretty name and suitable for my new plushy.. Kumari, the melancholy plushy.. Because her views is just soooo melancholic.. Beware! You can get crush with her.. Big eyes and little smile would make you couldn’t sleep 3 nights in a row.. hihi

n

It was already 2 hours went by .. What? Just needed 2 hours to forget my fever and recycle something.. Hopefully later, it would come another recycle idea because this fever wouldn’t go yet before I got busy with something huhu.. Anyway, really excited to have some fun with Kumari.. I hope she didn’t mind accompany this ill person hihi..

o

So this is it, guys.. Thank you for reading my post.. Hope my post will inspire you to make another Kumari.. Share yours, I’d love to see them too.. I would be so glad to meet you again in the next post.. Bye byee

RPENN_expressyourself-ribbon4

“I’m an environmentalist; I recycle.”~Kyrsten Sinema

Love,

D4779E20035572AC7E2816A17121536E2

Posted in DIY, Thoughts and Sense

Terima kasih, bulan Mei ♥

“Appreciation is wonderful thing : it makes what is excellent in others belong to us as well”~Voltaire

 ♥

RPENN_expressyourself-ribbon4


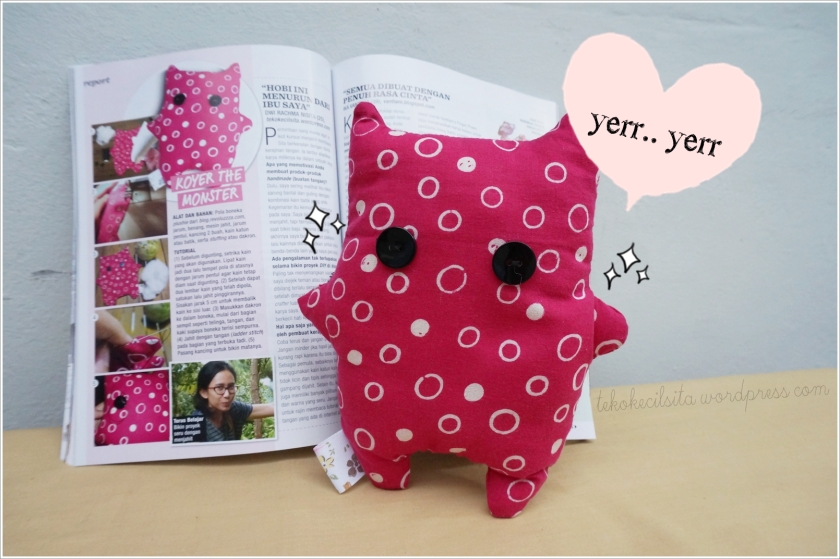
Hellooo.. Wow, time goes so fast.. May will be ended so soon.. Yet, I still have job matters to be finished on the weekend.. Niceeeeee.. Well today, I just want to take away all that jobs.. Yes, my fingers’ preferences are updating blog instead of boss’ assignment.. Hehehe..  Stealing time to tell my story about one of my plushies, Koyer the monster which become exist in one of the hits magazines in Indonesia.. ♥

a

Ahhh senangnya.. Ternyata ada juga yang perhatian dengan blog tekokecil.. Dengan segala klitik’an amatiran alias DIY, ‘do it yourself’ yang saya buat di waktu-waktu senggang.. Beneran lho, amatiran.. Baru juga setaun punya mesin jahit.. Belinya aja modal nekat, pakai gaji pertama ditambahin sama ibu soalnya gak tega liat anaknya punya uang tapi kurang.. hihi


Terima kasih bulan Mei, khususnya Dhea dan majalah Joy Indonesia yang udah khilaf kali ya masukin karya saya..?! Apalagi dijejerin sama craft blogger lain yang kece berat.. Saya jadi minder.. Ada yang bikin toples lucu, lukisan dan gelang.. Those are all pretty and genuine .. Sementara saya, masih pake pattern dari blog orang lain..


Tapi gapapa, namanya juga memulai.. Nanti dan very soon, saya mau bikin sesuatu yang pure my ideas.. Eh tapi kata ibu meskipun masih “contek” blog orang lain, si Koyer tetep beda kok.. Selain itu gak kalah lucu dan quirky di antara karya craft blogger yang lain.. hehe.. That is mom, she let her daughter always high and blush.. ♥


b


Anyway, Koyer juga gak kalah seneng lhoo bisa masuk majalah.. Walaupun cuma bisa bersuara “Yerr.. Yerr” aja, tapi dia kegirangan dan loncat-loncatan di kasur.. Udah gitu loncat-loncatannya ngajak temen-temennya, si Arimbi the long legs bunny dan Laras Sari the twins..  Rame banget ya.. Mereka bikin berantakan kasur aja niih.. hihi.. Tapi gak apa-apa kok..Gak mau gangguin boneka lagi happy ahhh..

Celebrate your happiness, Koyer!!


c


Nah ini dia penampakan cover majalah JOY Indonesia edisi Mei 2014.. Cantik ya Vanessa Hudgens!! Nyesel deh kalo sampe gak kebeli majalahnya kemarin.. Apalagi di dalemnya ada Koyer.. :p

f

Buat teman-teman yang gak sempat  beli majalahnya karena bulan Mei segera berakhir.. Ini, saya kasih khusus satu halaman tentang Koyer yaa.. Hehe.. Due to JOY Indonesia copyright, I can’t publish all contents.. Sorry for bad picture.. I hope you can still read it..  Selamat membaca dan mari bikin karya sendiri 🙂


g


See you at next post.. Semoga bermanfaat dan menginspirasi yaa..


 RPENN_expressyourself-ribbon4


“Terus belajar bikin proyek seru dengan menjahit” ~Nisita


Love,

D4779E20035572AC7E2816A17121536E2